Fusion 360
- Get the software
- Getting acquainted with Fusion 360
- Designing 3-d objects
- Designing an object based on a picture
Get the software
As a student, you can get a 3-year free academic license to use Fusion 360 (product of "AutoDesk").
Go to the Fusion 360 for students,... site, and sign up for an AutoDesk account. I'm guessing you should your goshen.edu college e-mail address for this. Once you've got an account, you should be able to download the software onto your personal laptop (PC or Mac).
Getting acquainted with Fusion 360
I followed the All3DP Fusion 360 tutorial for 3D printing (using a previous version on the Wayback Machine).
The Interface: Read this section with Fusion 360 open. Thing that I thought were particularly noteworthy:
- Whoa, the "timeline" was a new concept! You can usually tweak what you've already done by right-clicking on a particular step in the timeline and then choosing to Edit that step.
- Also, figure out for your computer how to Pan, Zoom, and Orbit your object. For example, I found that with my mouse with a scroll wheel, that I could press the scroll wheel as the "middle button". How does your track pad on your laptop do these things?
Designing 3-d objects
Follow the All3DP "popsicle" tutorial.
The general work flow is:
- Make a 2-d sketch of, say, a top-view of your object, in the x-y plane.
- then extrude pieces of your 2-d sketch: that is, give pieces of your 2-d sketch some thickness in the $z$ direction.
As you go, figure out how to save your work along the way. When you're done with the popsicle, save your final version. Then, additionally do a File | export to an .stl file. You could take this to Cura (the "slicing" software for our Lulzbot printer), and print the 3-d object you've made!
Using a picture to make a sketch
You can attach a "canvas" (image) to a drawing plane, calibrate the canvas to some dimension in your image, and then use the image as the basis for a sketch. You can use the sketch to "extrude" a 3-d image (as above).
See Import & Scale Images (Attach Canvas) [YouTube video].
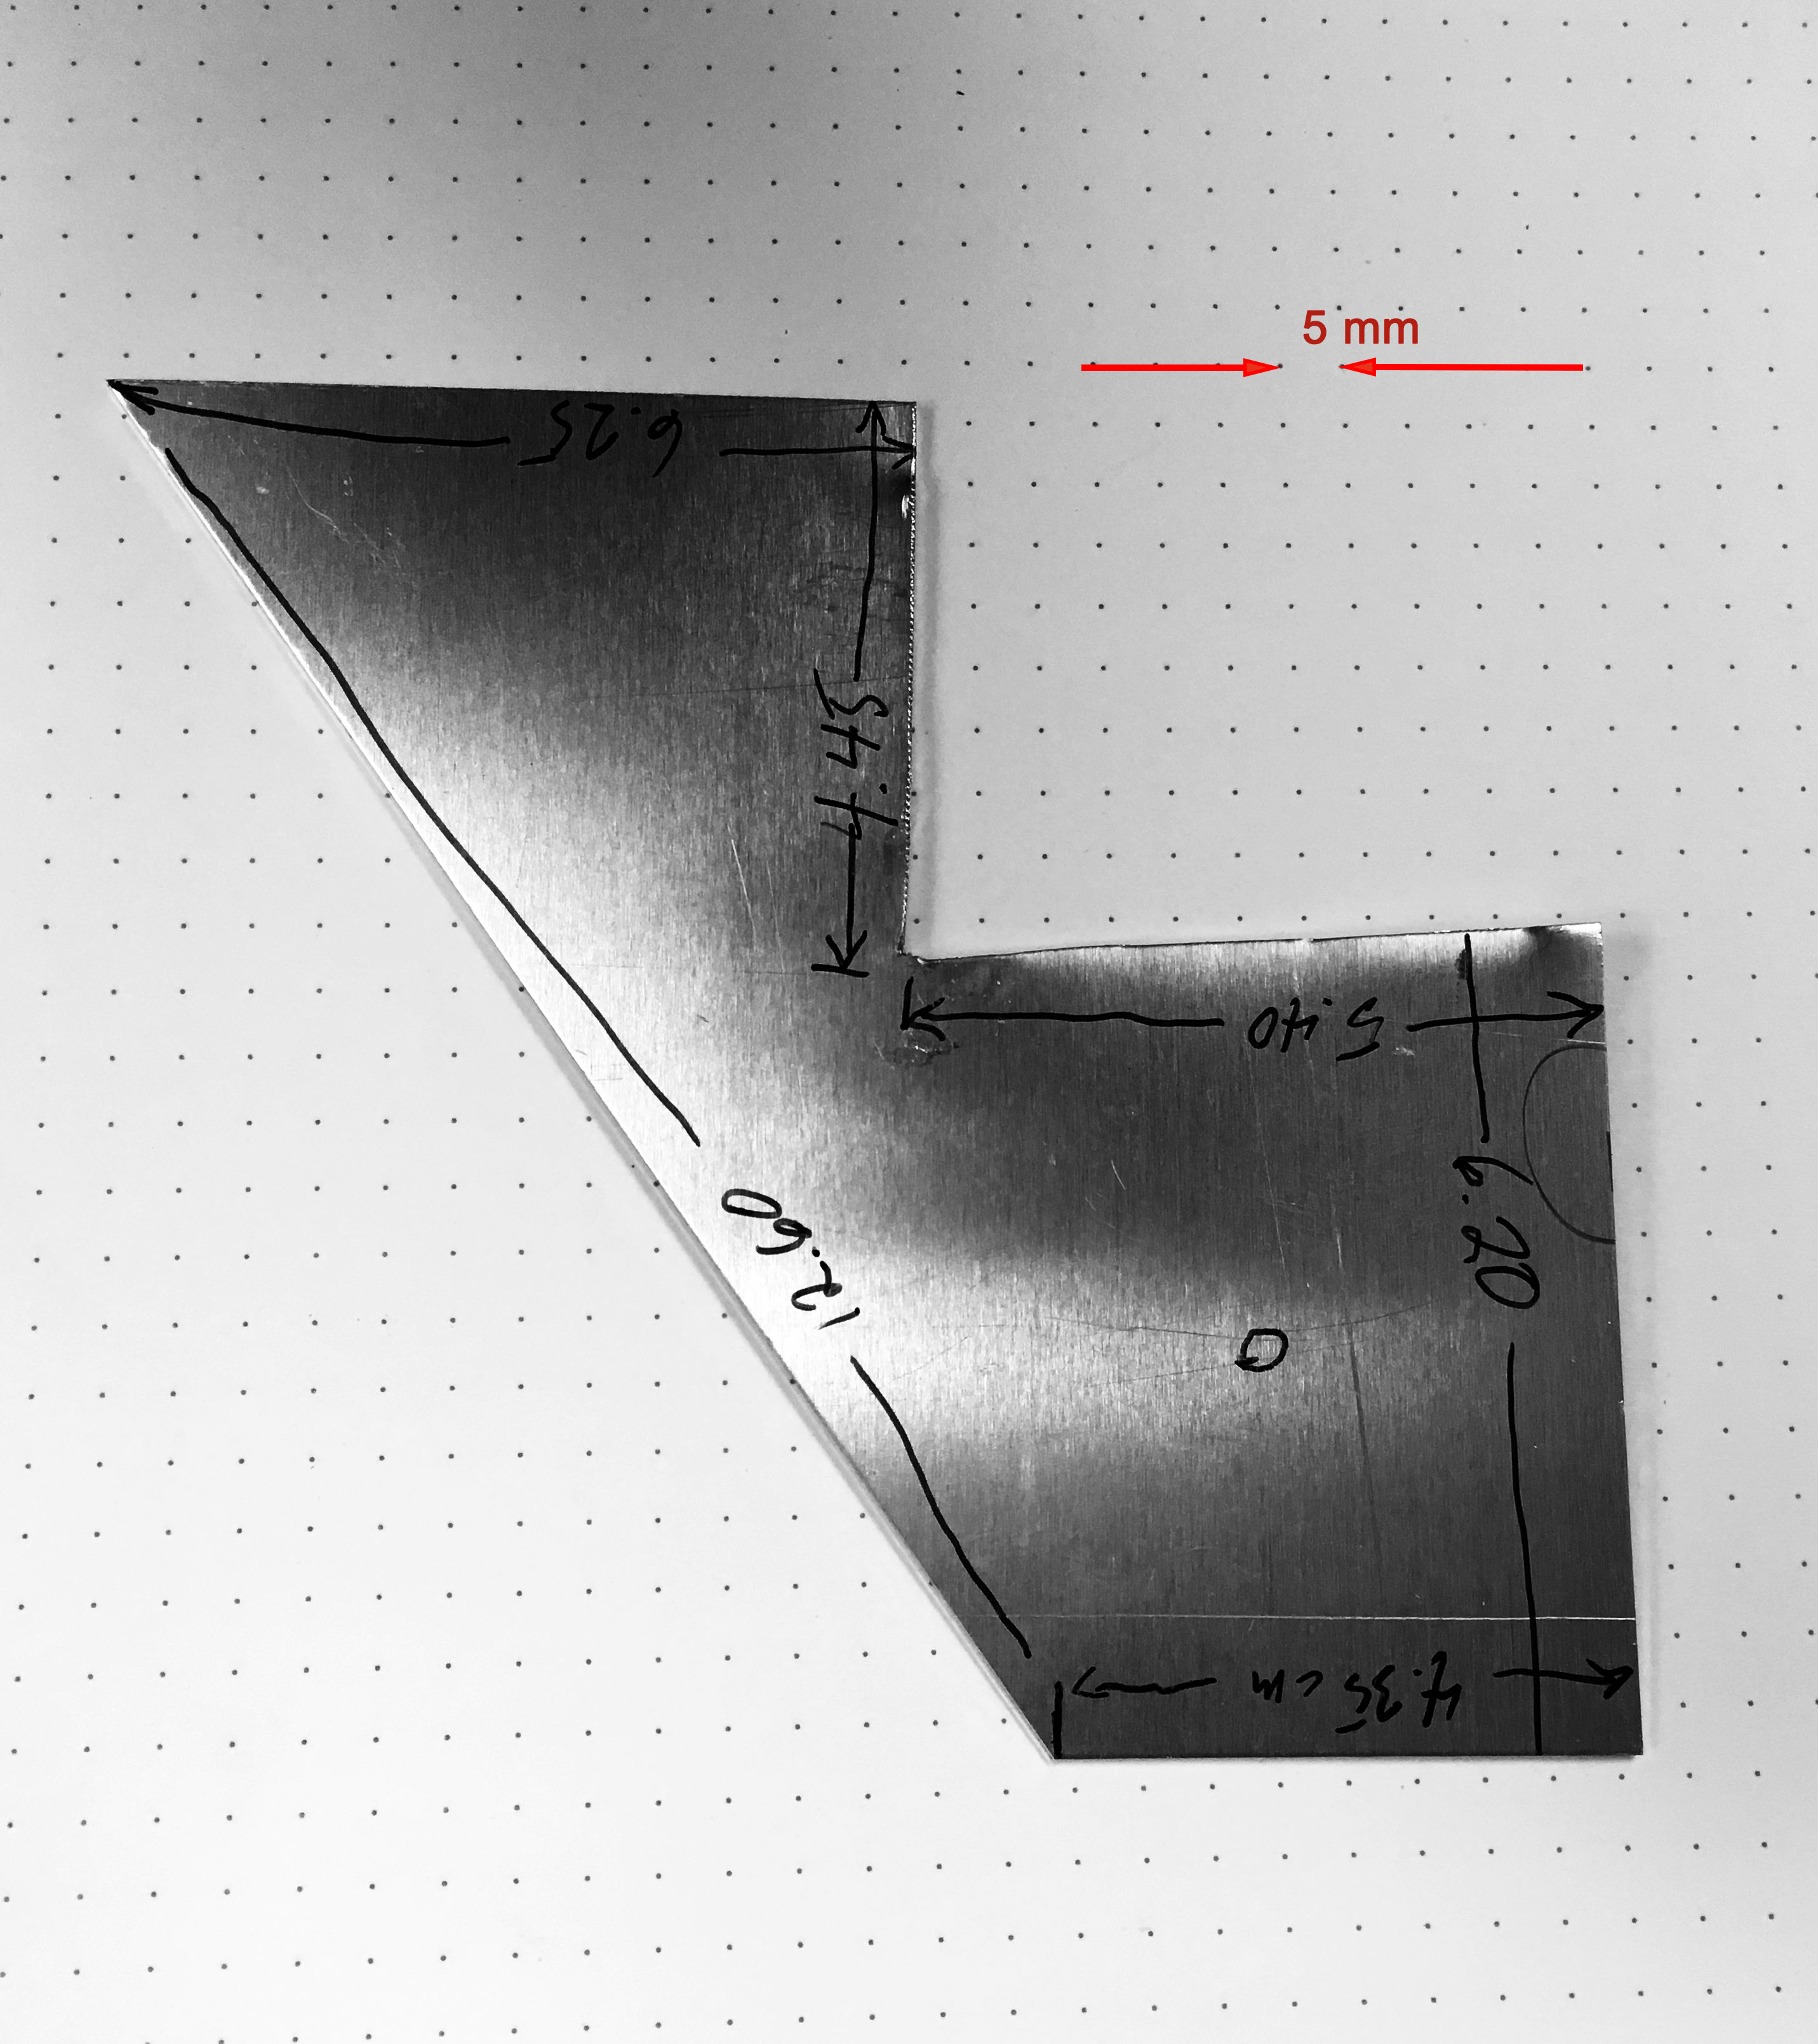
Preparation: Take a picture of your plate. Make sure your camera is pointed perpendicular to a point at the center of your plate. Make sure you know the dimensions of one edge of your plate. Here was my picture of my (complicated) plate. I marked its dimensions (in centimeters) on the plate.
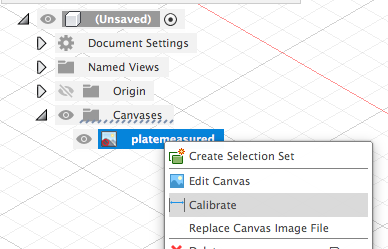
Then...- Insert | Canvas. Select the image and the plane (typically the "top" or x-y plane) to insert it into.
- Under "Canvases", right-click on the image you just inserted, and select calibrate.
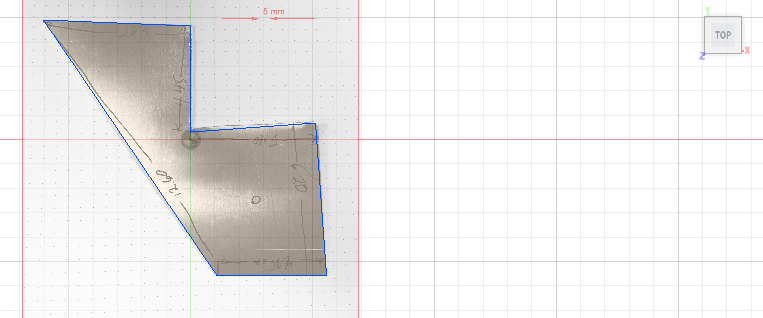
- You'll click two points, and then input the "real life" distance between those points. (Here, I've previously selected, under Document Settings | units to use cm as my units.)

- Now, CREATE | Create Sketch, Choose the line tool, and click on each of the vertices of your plane. Oh, in the sketching palette to the right, uncheck the box that says "snap to" so that you can click points anywhere, and not just on a rectangular grid.
- When you've created a closed set of line segments, click Finish sketch
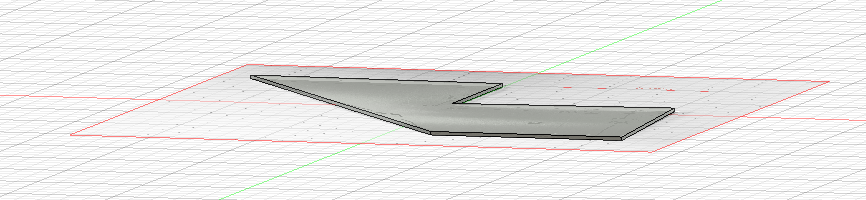
- Choose SOLID | Extrude and enter the thickness of the Al plate. The result should something like...