Vibration analysis project
In pairs, you will be making electronic laser holographic measurements and also doing finite element analysis modeling of the vibration modes of thin aluminum plate.
You will record the frequencies and vibration patterns of 10 vibration modes. Then you will modify your original plate by cutting off part of it and repeating the entire process to see how the frequencies have changed and how well the theory matches up with actual measurements.
The plate
These plates will will be simple shapes made out of 1/32 inch thick aluminum. You'll cut/shape these using the metal sheet press shear cutter (pictured below) and or tin snips in the Machine Shop.
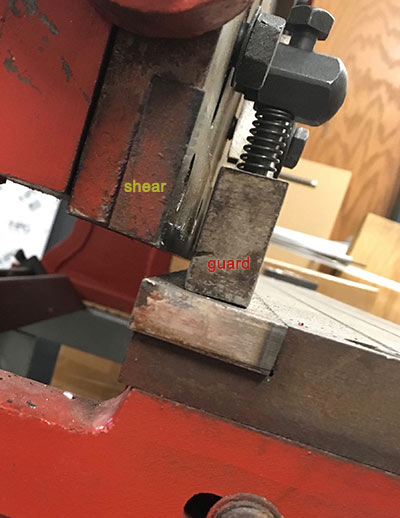 The shear cutter is a bit like a paper cutter for metal. To use it:
- turn the handle counter-clockwise to lift first the shear blade, then the guard.
- Then slide your sheet metal under the guard, such that the line to be cut is right along the edge where the shear will come down.
- Rotate the handle clockwise to bring the shear down and slice through your line.
Because you'll be feeding the dimensions of your shape into Fusion 360 to do the finite element calculations, you should keep the shapes fairly simple, with all or nearly all straight edges. Right angles are easier to deal with than arbitrary angles. Any curves must be well defined arcs of circles and easy to cut. You can mark out lines / arcs with a sharpie on the aluminum before cutting.
You must measure the dimensions of your plate precisely. Its thickness is 1/32 inch (0.03125 inches) or 0.794 mm. Measure its other dimensions precisely.
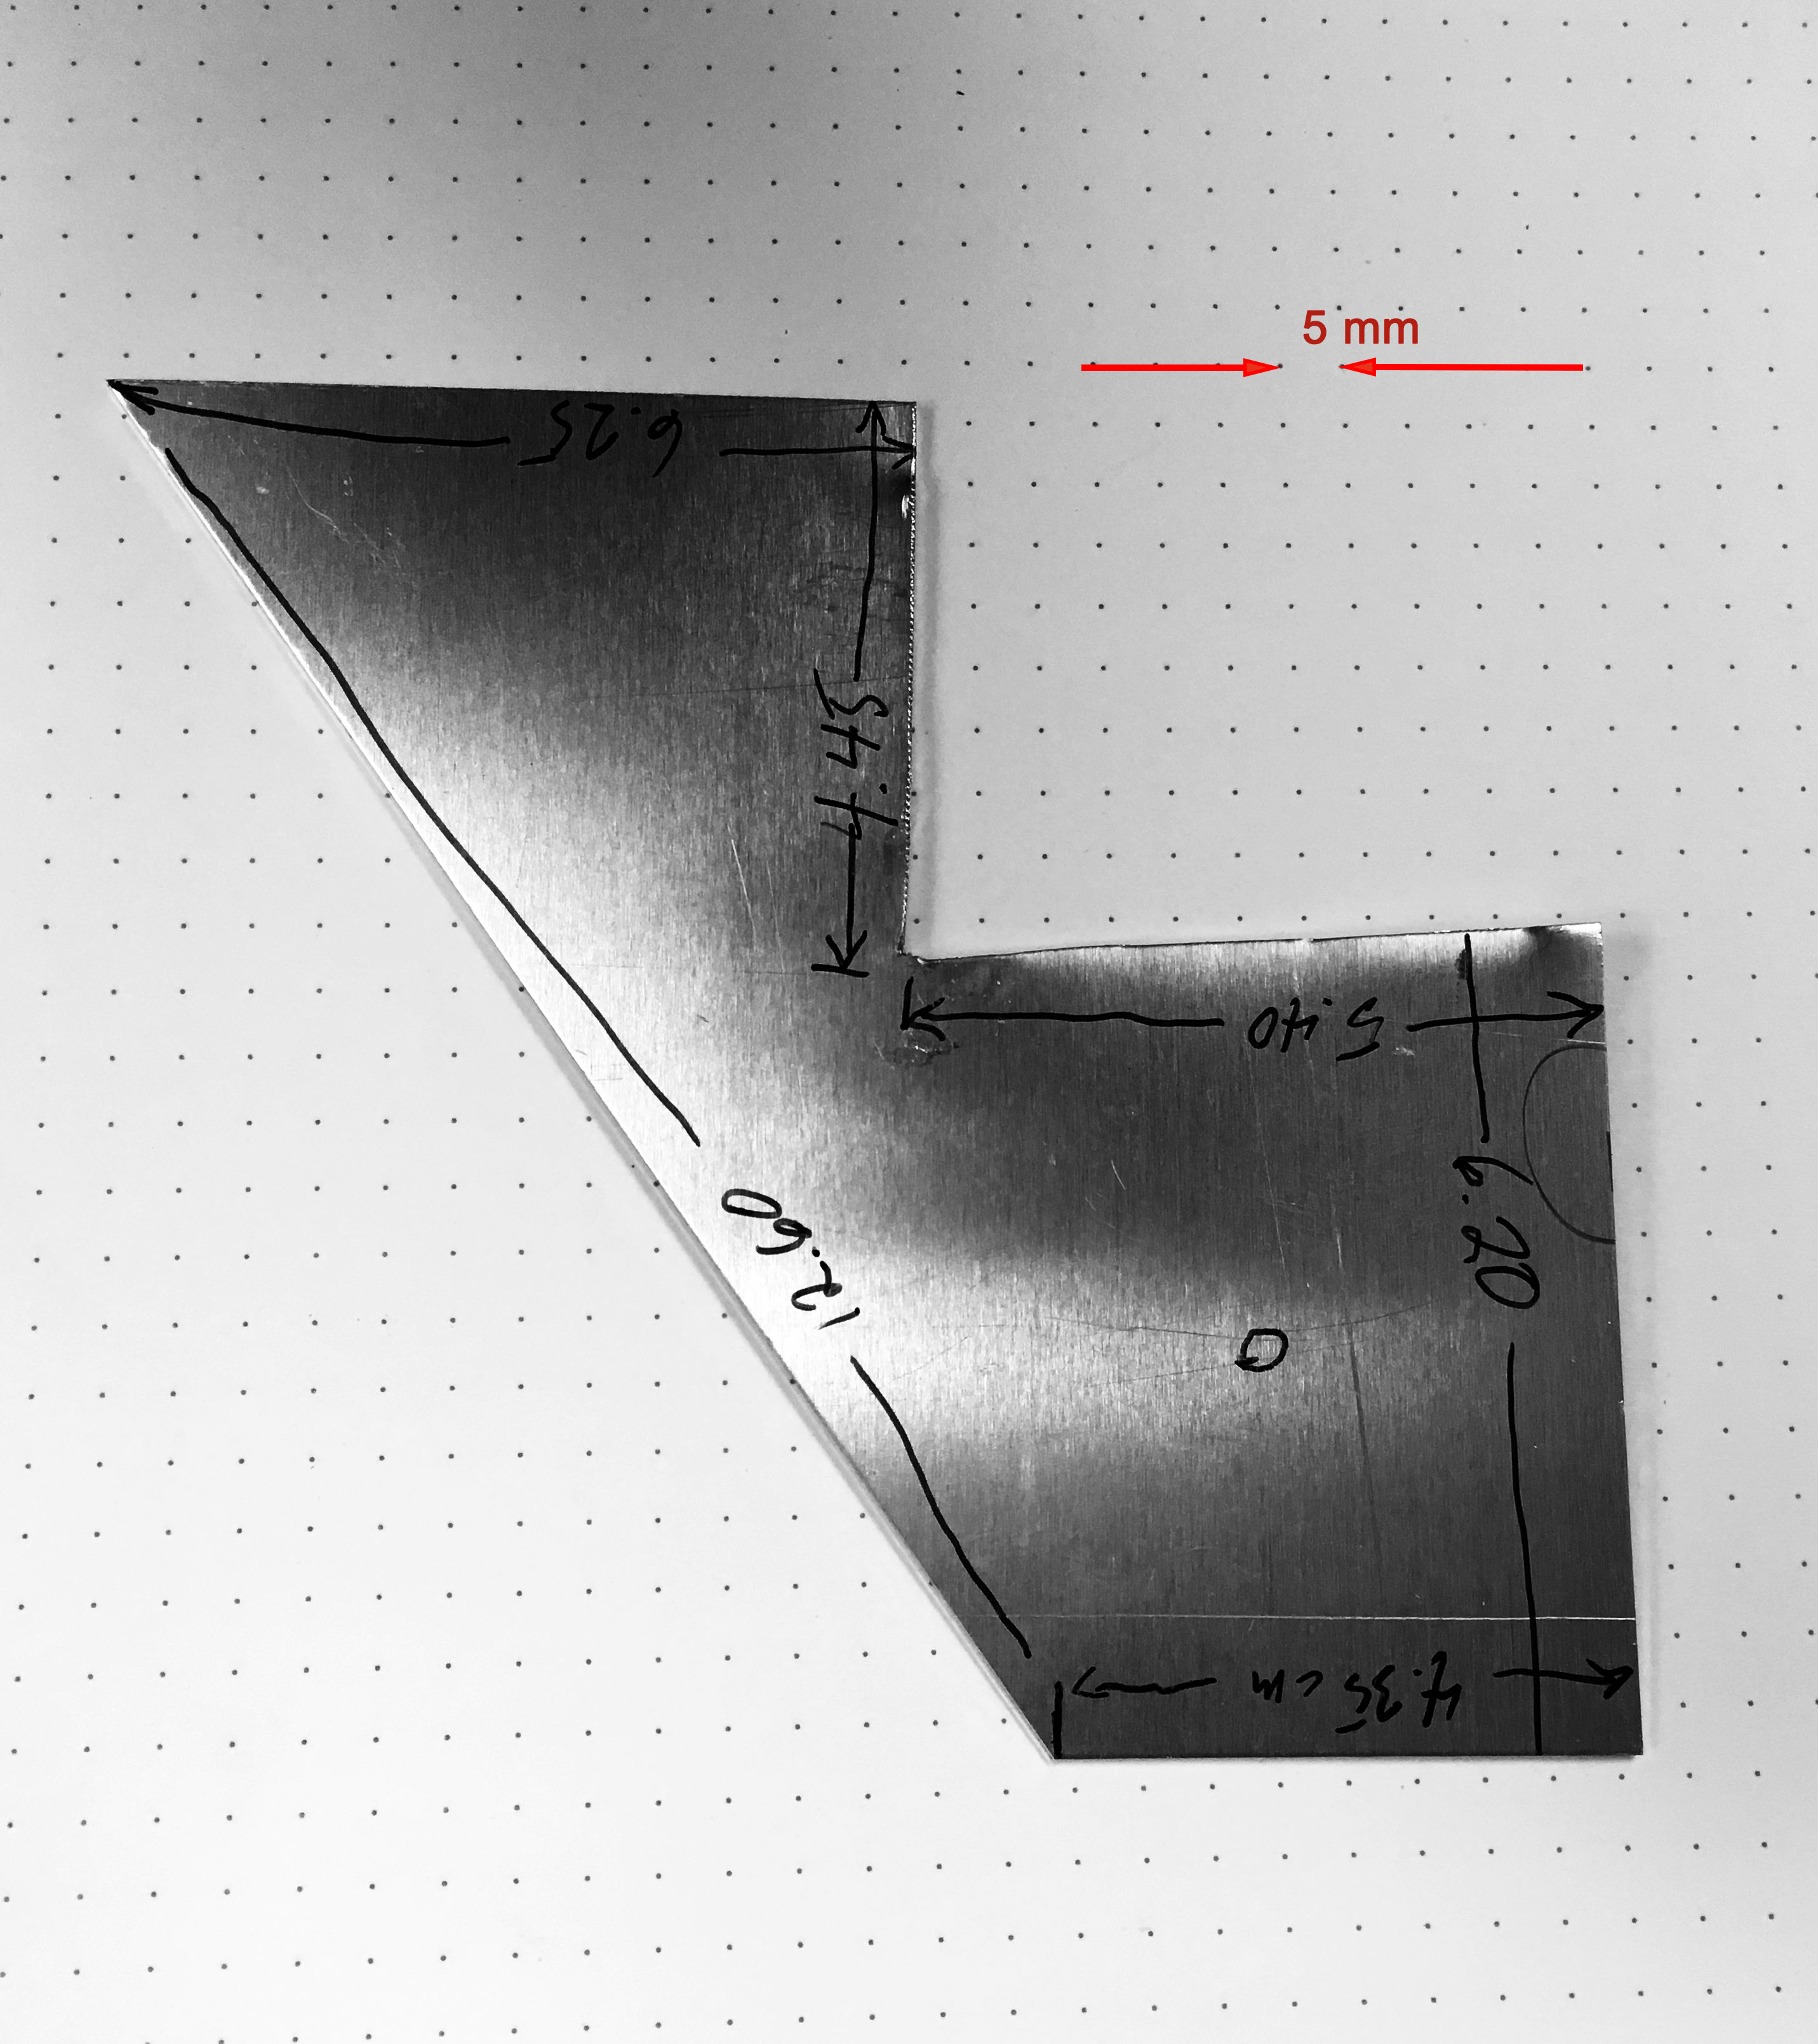
I put the measurements of my plate *on* the plate (in cm, to the nearest half a millimeter...) and took a picture of the plate on a 5 mm by 5 mm grid of points.
Once you have your plate, strike it to make it ring while holding it in a particular spot. Change where you hold it and keep striking and listening. Decide on the place that gives you the best and richest ringing. Mark this point clearly on the plate with a marker.
Laser Holography measurements
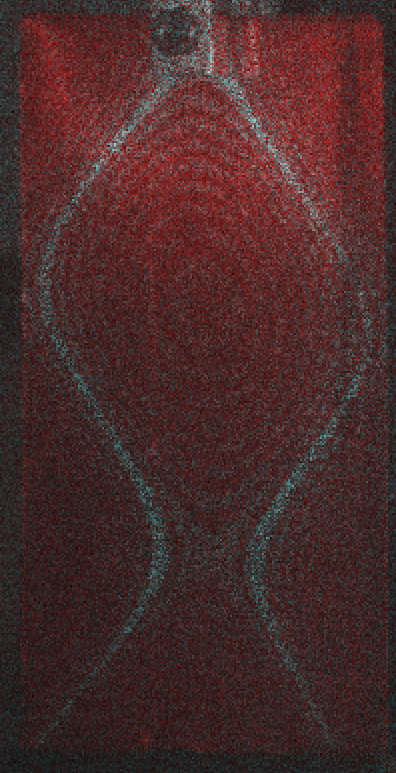 You'll mount your plate in the laser holography system in the Optics Lab. A little horn blares sound (pressure vibration of air) at your plate. You can change the frequency of the sound and look for "sympathetic" vibrations, or "resonances" on screen. You'll recognize these when a pattern of light and dark bands appears on screen. The lightest bands are the "nodes", which are not moving.
Instructions updated October, 2023
- Turn on the Laser
The laser power switches are on what looks like a computer case in front of you (while sitting at the computer).
- Turn on by the (lower) Laser Power button
- Turn on the key switch
Now if you look inside the optical head (the gray box with the lens sticking out) where the laser is you should see a green laser glow at the back (may take a few seconds...)
- Mount your plate on the clamp on the optical table. Where you clamp your point will always be a node (location where the plate is not vibrating). So a good place to clamp is at a corner. You should mark your clamp point on the plate, then clamp it at that point.
- Log on to the small HP computer in the usual way. If the Globe icon (bottom right) has a minus on it, you're not connected. So click on the Globe to connect to the campus wireless network.
- Start the HoloFringe program. There is an icon for it on the desktop. When it starts up you should see the message "connecting to the GigE camera" . Then this message disappears and two windows open and the program is running.
[If you see "camera initialization error", then check power to the camera. The camera itself has a dim yellow LED that flashes when it is working].
- Open the camera shutter by going to View Tools | View Raw Video. You should see a dim view of your plate in the large window. Then close this dialog: click Done
- Turn on the driver components
- Turn on the Crown amplifier and set the volume of the left channel to the 12:00 position. The right channel volume is not used.
- Turn on the Agilent Waveform Generator. (Push the power button in).
- Set the frequency by pressing the "Freq" button, then using the > and < buttons to choose what digit to adjust, and then using the knob to adjust. Start at about 400 Hz (this will make it quieter, for the time being...)
- If you sweep through the audio range of 100 - 5000Hz you should easily hear the sound and it should be a pure sinewave tone (the generator should be set for a sinewave). You can try the other wave forms, and you should hear higher overtones... Set it back to a sinewave.
- You may set the amplitude by pressing the "Ampl" button, then using the > and < buttons to choose what digit to adjust, and then using the knob to adjust. Keep the amplitude generally less than 1 V (= 1000 mV). A good starting value is 300 mV.
- Use the HoloFringe program. Go to Holography | Time Averaged Mode | Time Average Display. Then select Speckle mode, if it's not already selected. Then check the adjust phase step box.
- Click on START
- With no vibration of the object (turn the Crown LEFT 'volume' to 0)
generate a "reference frame".
- Set Frame Average to 4
- Leave Phase Step size at whatever it is
- Click on ACQUIRE and wait while it takes 4 images
- You should see an image that may have some reddish coloring
- If there are parts of the image that show glare (parts look "washed out" with no speckle), then you may want to reposition the object to reduce the glare (then go back to step a)
- See vibration modes live
- Return the amplitude of the Crown amp to the 12:00 position.
- Sweep the frequency while watching the display to find many resonances: You'll see a pattern rather than something uniform. Sweeping the 1 Hz digit works very well. If you go at any reasonable speed by 1 Hz you shouldn't miss any modes. When you locate a resonance, you can switch to adjusting by 0.1 Hz and fine tune (also move slower) to find the best resonance frequency. Once you have it peaked up, then adjust the amplitude to show the shape most clearly. The number of fringes/bars should increase with increasing amplitude. Try for 5-10 bars visible.
- To Acquire a good image..
The first tip is to wait and *not* acquire while a train is rumbling nearby! One there's no train, then...
- Click ACQUIRE and then wait while it collects several images and then puts the averaged result on the screen. It should be a much smoother image than the live image you were just seeing.
- To save the image
Use the "snipping tool" to copy just the image of your plate from the computer screen. Then File | Save...
It seems like every time you Acquire an image, it forgets the reference frame. So, for more holograms return to reference frame step, and and repeat.
When you're all done...
- Shut Down the entire system
- Turn off the Crown Amplifier
- Turn off the Agilent waveform generator
- Turn off the laser by the key switch AND by the lower power button
- Quit the HoloFringe program
- Logout