 width of the
digital images saved by a
width of the
digital images saved by a  width of SST
thumbnail images
width of SST
thumbnail images width of thumbnail images
used for navigation on the Washington Post
width of thumbnail images
used for navigation on the Washington Post 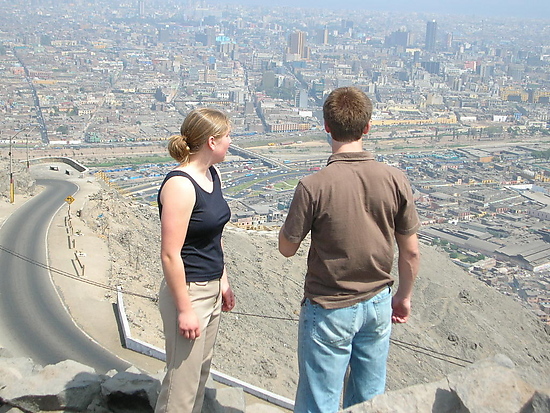
Image resolution, Image size
Resolution measures how close together a device, like a printer or a screen can place pixels. For example, a $200 laser printer can do 600 dpi ("dots per inch", that is, pixels per inch) these days, and glossy magazines would print out in the thousands of dpi. Computer screen resolution--at around 72dpi--is relatively low.
In the web world, we think of our medium (the screen) in terms of pixels, not in terms of "inches", and so web designers can pretty much ignore "resolution" and just pay attention to the total number of pixels.
Using Adobe Photoshop to edit digital images
Photoshop is probably the standard tool for dealing with photos and related graphics, both in print and web media. Some other software options to know about:
- Paint Shop Pro is a much less expensive tool that runs on PC's, that allows for many similar manipulations,
- MacroMedia Fireworks is optimized for web graphics, and offers many neat shortcuts,
- Gimp is a free package that runs on Linux.
Selection tools
 Selection
tools include
Selection
tools include
- the marquee-- selects a rectangle/oval/... from your image.
- the lasso-- lets you make a freehand-drawn selection.
- the magic wand-- selects all the pixels adjoining, and within a specified color range of the pixel you click on.
Here's a photo of Ben to practice on...
The most important key combination in Photoshop is probably Ctrl-Z which means Undo!
Extremely handy things to know about selection tools:
- Holding the (left) mouse button down on the tool will show you variations.
- Double-clicking will bring up some options.
- Use <shift>-select to add to the current selection. <alt>-select to subtract.
- You can "feather" a selection to make the boundary fade out. This is usually a last step before copying.
Choosing colors
 Many
tools use the foreground or background colors (at left, purple, and white respectively).
Clicking on the foreground (or background) color box brings up a color picker
that can be used to set colors. If you want a color that already exists in the
image you're editing, select the eyedropper tool. Left-click on a color
to select that color as the foreground color. Right-click to select as background
color.
Many
tools use the foreground or background colors (at left, purple, and white respectively).
Clicking on the foreground (or background) color box brings up a color picker
that can be used to set colors. If you want a color that already exists in the
image you're editing, select the eyedropper tool. Left-click on a color
to select that color as the foreground color. Right-click to select as background
color.
Using the text tool
- To be able to pick text sizes conveniently in points, image resolution should
be approximately the same as screen resolution (72 dpi). You can set this
from the Image Size dialog box, but if you change it, make sure to keep the
pixel dimensions the same as before.
- Anti-aliasing is a technique for making diagonal lines, smooth curves,
and similar objects that do not correspond very well to the rectangular pixel
grid look less jagged by subtly varying the pixel colors near the boundaries.
- Photoshop automatically places text in a new layer, which you may
then move around and delete later at will.
- Is the text going to go on top of a colored or patterned background? If
so, make sure your graphic has the same or similar color background when you
create the text graphic to avoid haloing: The graphic below was created
red on white, and then saved as a GIF (see below) with white set as the transparent
color. Now it's being displayed on a deep blue background:

Creating thumbnails
On the Web
- 30 X 30 thumbnails in the Washington Post's Van Gogh photo-essay
- HotWired's Photoshop Crash Course
 Use
the crop tool to select a portion of your image. Double-click inside your
selection to execute the crop..Then re-size ("Image | Image Size"),
then sharpen ("Filters | Sharpen"). Try this photo
from Cuba
Use
the crop tool to select a portion of your image. Double-click inside your
selection to execute the crop..Then re-size ("Image | Image Size"),
then sharpen ("Filters | Sharpen"). Try this photo
from Cuba
 When
you "downsize" an image, photoshop averages neighboring
pixels into one pixel in the new image. This will blur high contrast
edges. So, in general you should sharpen an image after you
downsize it significantly to get back to a reasonable edge contrast. Typical
Unsharp Mask parameters might be 40%, 1.5 pixels, threshhold 0.
When
you "downsize" an image, photoshop averages neighboring
pixels into one pixel in the new image. This will blur high contrast
edges. So, in general you should sharpen an image after you
downsize it significantly to get back to a reasonable edge contrast. Typical
Unsharp Mask parameters might be 40%, 1.5 pixels, threshhold 0.
Photo repair
Some typical photograph editing...
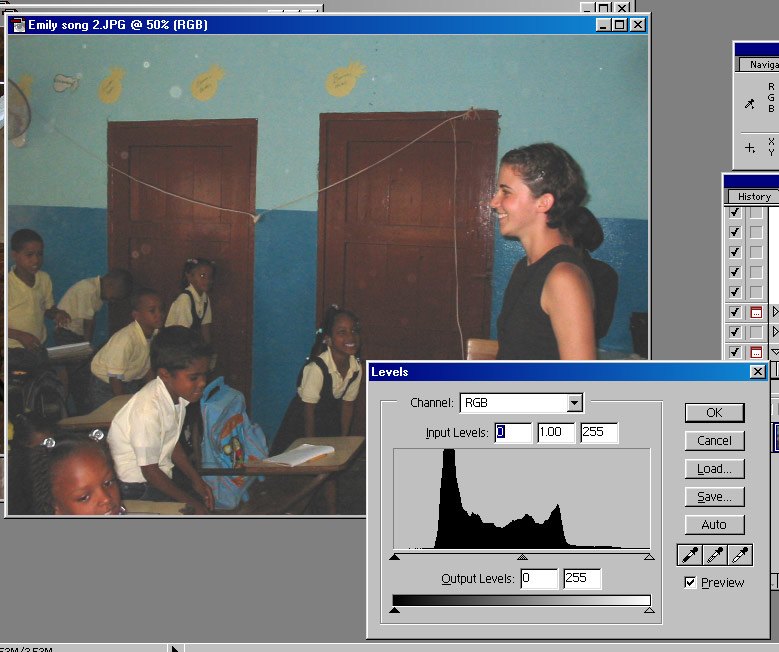
Backlit or dark subjects in photos (Gamma, or midtone correction)
Here's a backlit photo image. or another with part of the subject just too dark. You can quickly improve the photo quality by adjusting the midtones. Select "Image | Adjust | Levels" and you'll see this kind of dialog box:
Pull the middle slider to the left (or enter a larger number in the middle, "gamma level" box indicated) to lighten the midtones without severely affecting the highlights or deep shadows. Or, you can type a number into the gamma input box (underlined above). Experiment a bit. 1.2 is likely not noticeably distorted. 3.0 probably is...
Dynamic range
The photo below looks dull because it contains little in the way of very bright areas or very dark areas
You can increase the dynamic range of an image--that is, 'stretch out' the range of brightness in the image by bringing the far left and far right sliders in to the edges of the image levels spectrum as below. (The median gamma level has also been increased).

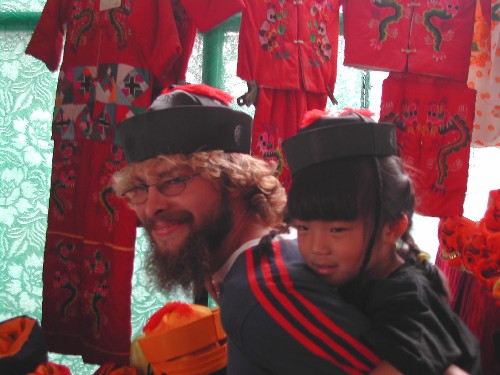
Color balancing
After you adjust levels, you may still wish to do some color balancing. Access this menu from "Image | Adjust | Variations". Here's a dark, and perhaps overly red image: KentMia.jpg. Here's what the variations menu looks like
Set the "Fine ... Course" closer to "Fine" and you'll see less drastic variations. You can explore the effect of making the image "greener" or giving it more in the way of the other color directions.
Repairing smudges
Image file types
Some common graphics/image file formats...
| .psd |
|
| .jpg, .jpeg |
|
| .gif |
|
| .png |
|
| .bmp |
|
|
In light of the above, you should probably keep an "original", editable image in .psd, or .png format, and create a copy at the final size for display on the web in .gif or .jpg format